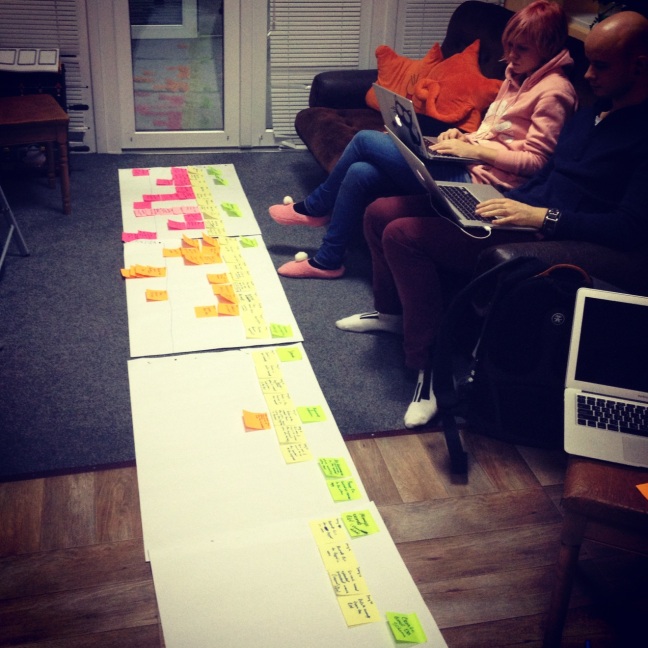
As the every development team we have to survive the big stress in the beginning of the project: our clients usually have a lot of ideas, requirements and push us to give them the estimations ASAP) Once we tried story mapping as the requirements gathering tool and sticked to it for a long time. Story mapping appeared to be a great thing when you want to understand what your system is intended to do.
Prioritized backlog helps a lot, when you want to know what to do next, but it is not the best choice, when you want to think about the whole system. A user story map arranges user stories into a useful model to help understand the functionality of the system, identify holes and omissions in your backlog. Also it is a great tool for planning releases.
Several items in favor of the story map:
- It is a great visualizing tool, as the alternative to the traditional project plans. It becomes the information source
- Story map provides the possibility to understand the product in the evolutionary way – starting from the whole view from the bird’s eye and ending by finding out the details of the user stories and tasks
- It shows the dependence between large user stories and their decomposition
- It helps to see the big picture in backlog
- Planing releases becomes much easier – you can see clearly what features will go to this or the next release. Also it encourages the iterative development – starting with something tiny and then develop it. The first versions, which can be created very quickly can be used for the validation of the idea.
- Great tool for making decisions, discussing and managing scope
- Encourages team collaboration
So how we do it with our team?
In the beginning of the project we form the “analysis team” of 1-2 developers, qa, designer, pm and customer. So, usually we have 4-6 people.
You will need: board/wall, stickers of 3 colors (Activity, Stories, Substories)
Flow:
1) We start with defining personas and choosing the main one.
2) Next we determine the main Activities of this persona in the application. The timeline goes from left to right. The order of the activities can change depending on the session of the user in the system, but there is some “basic” flow, which we intend to define.
3) After finishing with the activities we turn to the epic stories, which we need for the each activity. All activities will have several stories under them, placed in one line.
4) The next step is to discuss the sub-stories, which form the each story. They are placed vertically above the story. Here we come to the “importance” of the sub stories – the most important ones are on the top and the least important – in the bottom. Ideally – the top row will show you the minimal possible product.
The top lines with the activities and the stories show you the suggestion for the iterative development planning from left to right, the top to bottom shows you the importance of the tasks.
In the spaces between the steps where are a lot of discussions and reviews of the map with the product owner.
5) Releases planning. Now you have the complete vision of your system and it is time to plan releases. Product owner and the team define the features need to be done and add the horizontal lines, which define the release limits.
It shows the team the idea of the layer by layer development in rater simply way! The incremental development of the product helps us to leave the product growth balanced.
How it will look like in real life?
It can be a long line of the flipcharts:
or occupy a big white board:
The next thing you have to do – be sure, that the story map is not thrown away after you started the development and update it according to your progress.
We came across the illustration to such a way of development in one of the presentations, where the author compared it with onion:
 One of our team members had a brilliant idea to visualize the development process to the clients in the similar way – we showed them the releases layer by layer, so they got the high-level picture, which is so nice to show to investors:):
 Example of the visualization of the application development process
Our clients liked this scheme, so we shared this with the other projects teams.
Hope it was useful for you.


Reblogged this on 14 Emerton.